The Cost Of Installing Light Switches
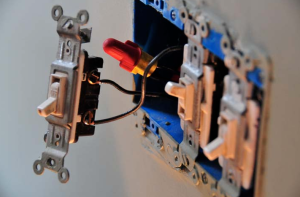
Over time, many of your light switches may need to be replaced. They can become outdated as the decor of your home changes. You may think that you can do this yourself; however, you have to keep in mind that major issues can occur from improperly installed electrical outlets and switches.
In addition, if you install your light switches wrong, then you may not pass a future house inspection and have to do it all over again, the right way. To save yourself both of these headaches, it is important to hire an electrician to do the job right the first time.
The benefit of hiring an electrician is knowing that you are ensuring your house is safe and up to code and can pass any inspection that comes your way. The downside of hiring an electrician is that it costs more money than doing it yourself. However, in this instance, the benefits far outweigh the cons
Some things to keep in mind:
1. Most electrical contractors like Conductive Electric tend to work on an hourly wage or per project basis. That means that you can save costs by having them do everything you need done in one trip. For instance, if you want to add some decorative switches and change some other switches to dimmers, then you should let your electrician know about all of those things beforehand. This will allow them to get the whole project done at one time, and avoid them having to come back at a later date.
2. The type of switch can end up increasing or decreasing the price, as some require more work than others do. For example, a motion sensor switch, which has extra wires, will take longer than your average switch, and in turn it will cost a little bit more to put in.
The best way to get a good price is to talk to more than one electrician. You can determine their expertise, and if you have the number of projects you need done, they should be able to give you a pretty good estimate on how much the project will cost.
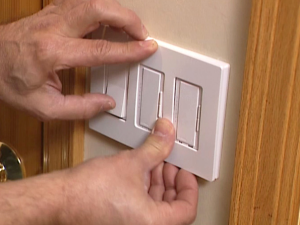
How to Install an Electronic Dimmer Switch
Installing an Electronic Dimmer – Introduction
Standard wall switches control power to light fixtures on a simple on-off basis. However, dimmers allow you to vary the lighting intensity by controlling the amount of voltage a fixture receives.
Old-style dimmers operated using a rheostat—a large variable resistor. As you increased resistance in the rheostat, the voltage to the lamp was decreased and the energy that would have gone to brighter light instead wound up as wasted heat energy dissipated in the dimmer.
But times have changed, and now we use electronic dimmers. Electronic dimmers now use an ingenious little device called a Triac. A Triac is a three terminal, solid-state electronic switch or relay that quickly turns power to a lamp on and off up to 120 times per second. Since this power sequencing occurs so fast, it is not perceptible to the naked eye. Other benefits are that it generates very little heat and saves energy.
Getting Started
So read on! This tutorial walks you through the steps of replacing a single-pole switch with an electronic dimmer using incandescent or halogen lighting. You can do it easily, create mood lighting and save energy in one easy project. If you have a three-way switch configuration, in which the light fixture is controlled by two switches, then you can install a dimmer to replace one of the switches, but make sure to buy a switch identified as a three-way dimmer.
NOTE: If you have a standard compact fluorescent bulb (CFL) or LED bulb, then dimmer switches will not work. If you want to dim a CFL or LED bulb, you will need a special dimmable bulb, which costs more than standard bulbs.
Best smart light switches
If you have a number of lights in your ceiling, installing one of the best smart light switches is the most practical way to let you integrate those fixtures into your smart home.
For one thing, if you install smart lights, rather than a smart light switch, every time you—or someone else—flips the light switch, you’ll lose the ability to control the lights. If you flick off a smart light switch, on the other hand, you can still control your lights from your smartphone, or using a voice assistant
A smart light switch lets you schedule your home lights to turn on and off at a set time, and make it look like you’re home when you’re on vacation. You can also connect smart light switches to other smart home devices, and program them to turn all your lights on if a smoke detector activates or your security system detects an intruder.
What are the best smart light switches?
After testing numerous models, we think the best smart light switch overall is the GE C-Start Smart Switch Motion Sensing Dimmer has a motion sensors built in, so it can automatically turn on the lights when you enter a room, and also has an ambient light sensor, so it won’t turn on your lights all the way if there’s a lot of sunlight coming in. That’s a smart feature that can save you money. And, this dimmer switch works with a wide range of bulb types.
However, the design of GE’s switch is a bit unconventional, so it will stand out more than other smart light switches. Leviton’s Decora smart dimmer has a more subdued design, but lacks the motion and ambient light sensor found in the GE switch.
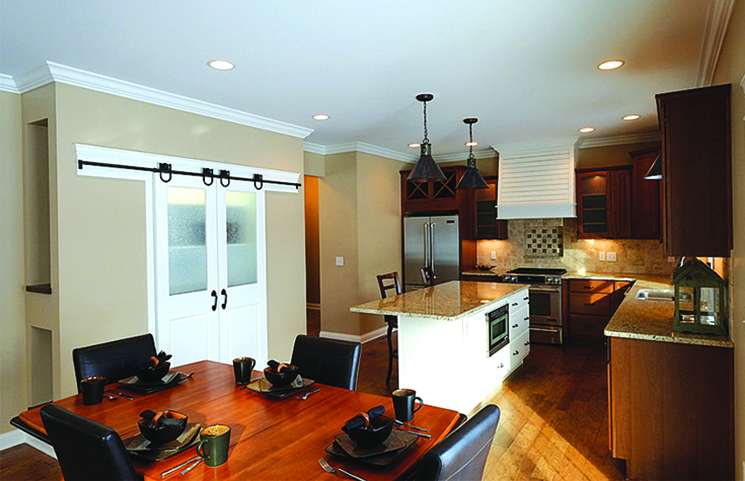
Things to know before you install that barn door of your dreams
Quality hardware is a must
Your barn door will be a focal point in your home, so it needs to look great, perform flawlessly and hold up under the wear and tear of everyday use. High quality hardware is durable, moves smoothly and quietly and beautifully complements your décor. It may cost a little more, but it will be worth it in the long run. Naturally we suggest the KV line for durable aluminum flat rail, round rail or stainless steel hardware kits in popular styles and finishes, sold through major hardware distributors
You need the right kind of space
A barn door can free up space compared to a swinging door, but it also needs room to slide along its track. If you’re mounting a single door, you need wall space on one side of your opening that is at least the width of the door, so it can slide completely open. For double doors you need wall space the width of an individual door on each side of the doorway. Make sure the wall has no light switches, outlets, windows, vents, doors or artwork that might impede the door or scratch it as it slides open.
The door must be wider than the doorway
That’s right. Barn doors hang from a track outside the room, covering the doorway, but leaving gaps at the sides between wall and door. For complete coverage and to minimize the gaps, make sure the door is at least several inches wider than the opening. For example, a 4-foot door will cover a 3-foot opening with 6 inches on either side, reducing the gaps. Buy a track that’s twice the width of your door: A 4-foot wide door takes at least 8 feet of track to slide completely open. For wider doors, cut the track to fit and join the pieces with connectors available from the hardware manufacturer
Structural support is required
Barn doors can be heavy – up to 200 pounds or more, so for sturdiness, most people mount the track to a header, attached to the wall studs, above the doorway. A 2 x 6 cut twice as long as your track should do the trick. If you mount on wall studs, be sure there is a stud or wood block at every interval on your track, including beyond the door opening. Wall anchors are not sufficient support for hanging these doors. Bonus: Mounting your door to a header positions the door far enough from the wall to clear the door frame and trim when sliding.
You’ll need a handle; maybe a latch
A handle or pull lets you slide the door open and shut easily, and it looks great. This works on the outside, but you’ll need to install a recessed pull on the inside so the door clears the door jamb when it slides open. If your barn door is the entry to a bathroom or bedroom, you’ll find different privacy latching solutions available, from a hook and eye closure to a latch with strike plate – even a decorative deadbolt will work. Choose handle, recessed pull and latch in a style and finish that complements your door and hardware.
How much does an electrician cost?
From routine electrical installation or repair work to emergency call-outs, you’re probably going to need the services of an electrician at some point in your life. When power failures and issues occur, your first priority is to get the issue fixed. Pricing, however, is easily a close second.
For example, you need to consider whether your electrician is fully qualified. A fully qualified electrician will ensure:
A safe electrical installation which complies with the latest electrical wiring regulations.
A fully verified, inspected and tested electrical installation – complete with a signed electrical certificate which validates the job.
Where required, submission of work to council authorities and/or inspectors. There’s no use getting electrical work done if the electrician is unprofessional, unqualified and inexperienced – no matter how cheap their rates are. An unqualified electrician can cause more harm than good, putting you, your family or your team in danger.
Now, the next most important consideration – costs for good, reliable electrical work. We’ve compiled an extensive guide to electrical costs to help you make an informed decision for you and your family, plus ensure you have some knowledge about our prices prior to engaging our electrician
EMERGENCY & REPAIR WORK (NON-QUOTED)
Let’s face it – accidents and emergencies happen. Some emergencies like a blown fuse or changing a light bulb can usually be attended to without the assistance of an electrician. However, it’s important to put your safety first and if in doubt, it’s best to let a qualified emergency electrician assess the situation for you.
With the increasing number of electrical gadgets in everyday life, it seems like there’s never a power point when you need one. Most people can get by using powerboards but these can become unsafe and you risk an overload if you’ve got more than one powerboard plugged into any one socket.